by
by Want to build a Continuous Integration pipeline for an ESP32 in which you run several tools against your source code, send it to SonarQube, then build a source code binary? How about every time you commit? If so, you are in the right place.
Follow the great guide by Stark & Wayne for setting up Concourse. I’ll assume that you are familiar enough with it for this post.
High level breakdown of the pipeline
Here is a high level breakdown of the tasks that are performed by this pipeline:
- Resources – get source code
- Jobs – run these tasks independently in containers
- cpplint – Run cpplint against the source code
- cppcheck – Run cppcheck against the source code
- flawfinder – Run flawfinder against the source code
- sonarscanner – Run sonar scanner against the source code, making sure that reports from above jobs are available
- build – Build the ESP32 binary using platformio and any libraries that are needed. Produces an output binary that can be programmed onto devices
Scripts for each tool, if needed, is included in the ci directory in my example repository. script-sonarscanner.sh will need to be customized for your particular SonarQube installation

I will be using the following pipeline for this tutorial:
resources:
  - name: repo
    type: git
    source:
      uri: https://gitlab.com/KeyOpt/ESP32-Smarter-Home
jobs:
  - name: tests
    public: true
    plan:
      - get: repo
        trigger: true
      - in_parallel:
        - task: cpplint
          config:
            inputs:
              - name: repo
            outputs:
              - name: cpplint
            platform: linux
            image_resource:
              type: docker-image
              source: { repository: python, tag: latest}
            run:
              path: bash
              args:
                - repo/ci/script-cpplint.sh
        - task: cppcheck
          config:
            inputs:
              - name: repo
            outputs:
              - name: cppcheck
            platform: linux
            image_resource:
              type: docker-image
              source: { repository: facthunder/cppcheck, tag: latest}
            run:
              path: bash
              args:
                - repo/ci/script-cppcheck.sh
        - task: flawfinder
          config:
            inputs:
              - name: repo
            outputs:
              - name: flawfinder
            platform: linux
            image_resource:
              type: docker-image
              source: { repository: python, tag: latest}
            run:
              path: bash
              args:
                - repo/ci/script-flawfinder.sh
      - task: sonarscanner
        config:
          inputs:
            - name: repo
            - name: cpplint
            - name: cppcheck
            - name: flawfinder
          outputs:
            - name: repo
          platform: linux
          image_resource:
            type: docker-image
            source: { repository: sonarsource/sonar-scanner-cli, tag: latest}
          run:
            path: bash
            args:
              - repo/ci/script-sonarscanner.sh
      - task: build
        config:
          platform: linux
          image_resource:
            type: docker-image
            source: { repository: python, tag: latest}
          inputs:
            - name: repo
          run:
            path: sh
            args:
              - -exc
              - |
                cd repo
                pip install -U platformio
                platformio run -e ezsbc
                mkdir ~/output
                mv .pio/build/ezsbc/firmware.bin ~/output/firmware_ezsbc.bin
          outputs:
            - name: output
To activate the pipeline, you’ll need to send it to the Concourse server that you set up earlier. In my case I named my target as “esp32-smarter-home” and named the pipeline the same. To set the pipeline:
fly -t esp32-smarter-home set-pipeline -c pipeline.yml -p esp32-smarter-homePipelines start in the paused state. You can un-pause it through the UI and using fly.
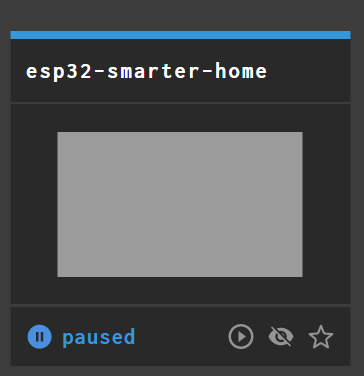
With it un-paused, it will start to execute each job within the pipeline (downloading the associated docker images if needed):

You can click on the build progress of each step:

If everything succeeds the UI shows that it succeeded:

The great thing about this is that all of the details regarding configuring your pipeline is within pipeline.yml, so it will literally take just a few steps to move this pipeline to a new server. Awesome!
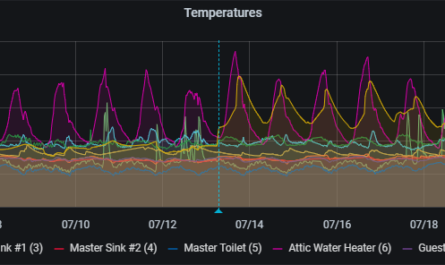
Since Sonarscanner is a part of the pipeline, results from cppcheck automatically get interpreted by SonarQube: